
In this categoryImage Tools · 47
- How to Generate Your First Image with Midjourney on DiscordStart
- How to Write Midjourney Prompts That Actually Work
- How to Upscale and Export High-Resolution Images in Midjourney
- How to Create Consistent Characters in Midjourney with --cref
- How to Use Image Prompts and the /blend Command in Midjourney
- How to Lock a Visual Style Across Images with Midjourney --sref
- How to Set the Right Aspect Ratio for Each Platform in Midjourney
- How to Edit Parts of an Image with Vary (Region) in Midjourney
- How to Extend an Image with Pan and Zoom Out in Midjourney
- How to Batch Many Variations with Permutation Prompts in Midjourney
- How to Organize and Rerun Your Images from the Midjourney Website
- How to Install ComfyUI on Windows with an NVIDIA GPU
- How to Run Flux.1 Dev in ComfyUI
- How to Install ComfyUI Manager to Add Nodes and Models Easily
- How to Generate Fast Images with Flux.1 Schnell in ComfyUI
- How to Use a LoRA in ComfyUI
- How to Write Better Prompts for Flux in ComfyUI
- How to Upscale AI Images in ComfyUI with an ESRGAN Model
- How to Inpaint and Fix Part of an Image in ComfyUI
- How to Batch Generate Many Image Variations in ComfyUI
- How to Control Image Composition with ControlNet in ComfyUI
- How to Fix Out-of-Memory and Slow Generations in ComfyUI
- How to Upscale a Photo in Magnific Without Hallucinating New Detail
- How to Restore an Old Scanned Photo with Topaz Photo AI
- How to Remove the Background from a Product Photo in Photoroom
- How to Generate a Lifestyle Background for a Product in Photoroom
- How to Upscale and Restore an Old Photo with AI
- How to Batch Upscale a Folder of Images with Topaz Photo AI
- How to Add Detail to AI Art with Magnific's High Creativity Mode
- How to Relight a Flat Product Photo Using Magnific Relight
- How to Batch-Edit Product Photos for Shopify with Photoroom
- How to Choose Between Topaz Photo AI and Gigapixel for Heavy Enlargements
- How to Add a Realistic Shadow to a Cut-Out Product in Photoroom
- How to Batch Edit Photos with AI Presets
- How to Fix a Blurry Face in a Portrait Across Topaz and Magnific
- How to Make a Logo in Canva from a Text Prompt
- How to Create a Logo with Readable Text in Ideogram
- How to Design a Clickable YouTube Thumbnail in Canva
- How to Remove an Image Background in Canva
- How to Resize One Graphic for Every Platform in Canva
- How to Build an Instagram Carousel in Canva
- How to Set Up a Brand Kit in Canva for Consistent Graphics
- How to Make a Social Quote Graphic in Ideogram
- How to Design a Blog Featured Image in Canva
- How to Create Podcast Cover Art with Ideogram and Canva
- How to Upscale an AI Image for Print Quality
- How to Write Image Prompts That Get Usable Results
How to Control Image Composition with ControlNet in ComfyUI
Use a ControlNet to lock a pose, depth, or edge layout from a reference image so your generation follows a structure you choose.
ControlNet conditions a generation on the structure of a reference image. You can lock a human pose, follow a depth map, or trace edges, so the output matches a layout you decide rather than whatever the model invents. This guide builds a basic ControlNet chain using a preprocessor and a ControlNet model.
What you need
- A base checkpoint (SD 1.5 or SDXL)
- A ControlNet model that matches your base (for example control_v11p_sd15_openpose)
- A preprocessor node pack such as ComfyUI's ControlNet Aux nodes
- A reference image to extract structure from
Step 1: Install the ControlNet model and aux nodes
Place the ControlNet model in models/controlnet. Install the ControlNet Aux preprocessor pack through ComfyUI Manager so you get nodes like OpenPose Pose and Depth Anything.
Step 2: Preprocess the reference
Load your reference image, then feed it into a preprocessor node that matches your ControlNet. For pose control use the OpenPose preprocessor, which turns the photo into a stick-figure skeleton. For layout use a depth or canny edge preprocessor instead.
Step 3: Add the Apply ControlNet node
Add an Apply ControlNet node and a Load ControlNet Model node. Feed the preprocessed image and your positive conditioning into the apply node, along with the loaded ControlNet model.
Step 4: Route conditioning into the sampler
The Apply ControlNet node outputs modified conditioning. Connect that into your KSampler's positive input in place of the raw text conditioning. Now the sampler honors both your prompt and the reference structure.
Load ControlNet Model -> Apply ControlNet (control_net)
OpenPose Pose          -> Apply ControlNet (image)
CLIP Text Encode (+)   -> Apply ControlNet (conditioning)
Apply ControlNet (out) -> KSampler (positive)Step 5: Generate and compare
Queue the prompt. The output should share the reference's pose or layout while taking its subject, style, and details from your prompt. Try a few seeds to find one where the structure and the content agree.
Result: a generation that obeys a pose or composition you chose. Swap the preprocessor and matching ControlNet model to control depth, edges, or scribbles instead.
Watch related tutorials
 26:00
26:00 11:05
11:05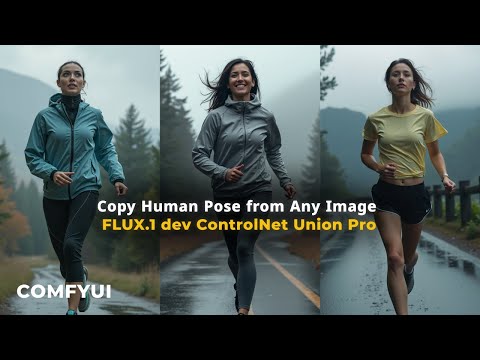 15:00
15:00 13:00
13:00 19:20
19:20 14:18
14:18New guides in your inbox
Fresh step-by-step how-to guides as we publish them. One email a week, no more.